All Machine Learning has a basis in..erm…learning. What this means is that a model starts with a understanding of weights, rules and most of all data. We give it data to learn, telling the model what data leads to whatever conclusion. At the smaller level, it could be just a score of whether an item is a circle or a square, to what sentiment a block of text relates, to multiple servos and sensors working toward a common goal.
In terms of training something non-physical, such as shape recognition or sentiment we simply feed it data, and correct it when wrong, then continue a feedback loop.
However, when dealing with the latter example, of a robot which has a collection of sensors, or a industrial machine which also has sensors you need to be able to model the robots sensors and readings in an environment as close as possible to the real world. These models are called digital twins, and can scale from a single heat or motion sensor, to a full semiconductor fabrication plant. Fundamentally, they are the same. They are digital representations of environments or data that the model experiences.
Where a model for robot movement needs to reinforce learned behaviour on how to navigate steps, we have two options. We can either work out the stream of the data that would need to be sent to each sensor and run repeatedly, or create a 3d world and adapters that allow the model to experience the world within a controlled environment.
Omniverse
NVIDIA has the omniverse, which offers digital twins connectors to enable models to learn and common game engines such as Unreal and Unity to be used within the omniverse pipeline.
Omniverse Assets are authored using USD (Universal Scene Description):
– Robot geometry, joints, sensors
– Physics properties (mass, friction, collisions)
– Environments (factories, warehouses, terrain)
Obviously, this is a massively simplified explanation to what Omniverse does, and I’m not going to go into physics simulation, synthetic environmental effects and the overall pipeline here.
This. Is just pre-amble.
Highleyverse
In my last post I fiddled with the pySC2 project, where models are specifically created to play a tactical video game. But what if each entity in the video game also needed to be trained to navigate the terrain? This massively complicates pySC2, so i have took a step back and decided to create a 3d world and a simple agent with a task of getting to a specific point in the world.
The world will be made using A-FRAME Javascript 3D and will use python to move an agent randomly towards the goal. This is as basic a digital twin you could possibly think of. A synthetic environment and an agent with feedback from the environment.
The A-FRAME world has built in physics that declare items solid, and we will use that to feed back to the agent when they have attempted to move towards a solid object. They will learn the map through touch.
A-Frame
Back in the early 90s I was a university student, with an interest in 3D graphics, Game Development and programming. During my journey in University I encountered several epoch building events. Firstly, Netscape Navigator 2 was released in 1995, and that included Javascript, then Netscape Navigator Gold was released, and in the interim VRML was supported. VRML was a very basic first attempt at creating a HTML for 3D. It was great, and comprised of a notation which represented the world. 3D studio max had VRML exporters and I recreated a college campus in VRML. Sadly, I have no photographs or printouts remaining. I mention this as A-FRAME seems to have a similar outlook on using objects to represent 3D to VRML2, which was a more XML-esque tag.
Example of VRML-X3D from the SigGraph98 Course
#VRML V2.0 utf8
# AnchorExample.wrl (VRML97 version of your X3D)

WorldInfo { title "AnchorExample.wrl" }

Transform {
  translation 0.0 -2.5 0.0
  children [

    # Shape Stair is a DEF node that has 2 USE nodes
    DEF Stair Shape {
      appearance Appearance {
        material Material { diffuseColor 1.0 1.0 1.0 }
      }
      geometry Box { size 4.0 0.25 1.0 }
    }

    Transform {
      translation 0.0 0.5 -1.0
      children [ USE Stair ]
    }

    Transform {
      translation 0.0 1.0 -2.0
      children [ USE Stair ]
    }

    Transform {
      translation 0.0 4.125 -2.6
      children [
        Anchor {
          description "Twisty Stairs"
          url [
            "Stairway.x3d"
            "https://www.web3d.org/x3d/content/examples/Vrml2Sourcebook/Siggraph98Course/Stairway.x3d"
            "Stairway.wrl"
            "https://www.web3d.org/x3d/content/examples/Vrml2Sourcebook/Siggraph98Course/Stairway.wrl"
          ]
          children [
            Shape {
              appearance Appearance {
                material Material { diffuseColor 0.6 0.4 0.0 }
              }
              geometry Box { size 3.0 6.0 0.2 }
            }
            Transform {
              translation 1.18 0.0 0.2
              children [
                Shape {
                  appearance Appearance {
                    material Material { diffuseColor 0.3 0.3 0.3 }
                  }
                  geometry Sphere { radius 0.15 }
                }
              ]
            }
          ]
        }
      ]
    }
  ]
}
X3D
<Scene>
    <!-- Things to experiment with: -->
    <!-- Change the anchor's URL to point to one of your own worlds. -->
    <!-- Add more doors and stairs. Add walls, floor, ceiling, etc. -->
    <WorldInfo title='AnchorExample.x3d'/>
    <Transform translation='0.0 -2.5 0.0'>

        <!-- Shape Stair is a DEF node that has 2 USE nodes: USE_1, USE_2 -->
        <Shape DEF='Stair'>
            <Appearance>
                    <Material diffuseColor='1.0 1.0 1.0'/>
            </Appearance>
            <Box size='4.0 0.25 1.0'/>
        </Shape>
        <Transform translation='0.0 0.5 -1.0'>
            <Shape USE='Stair'/>
        </Transform>
        <Transform translation='0.0 1.0 -2.0'>
            <Shape USE='Stair'/>
        </Transform>
        <Transform translation='0.0 4.125 -2.6'>
            <Anchor description='Twisty Stairs'   url=' "Stairway.x3d" "https://www.web3d.org/x3d/content/examples/Vrml2Sourcebook/Siggraph98Course/Stairway.x3d" "Stairway.wrl" "https://www.web3d.org/x3d/content/examples/Vrml2Sourcebook/Siggraph98Course/Stairway.wrl" '>
                    <Shape>
                        <Appearance>
                            <Material diffuseColor='0.6 0.4 0.0'/>
                        </Appearance>
                        <Box size='3.0 6.0 0.2'/>
                    </Shape>
                    <Transform translation='1.18 -0.0 0.2'>
                        <Shape>
                            <Appearance>
                                <Material diffuseColor='0.3 0.3 0.3'/>
                            </Appearance>
                            <Sphere radius='0.15'/>
                        </Shape>
                    </Transform>
            </Anchor>
        </Transform>
    </Transform>
</Scene>
And the A-FRAME equivalent (albeit an extension of `three.js`)
<!-- Requires A-Frame: <script src="https://aframe.io/releases/1.5.0/aframe.min.js"></script> -->
<a-scene>
  <!-- WorldInfo title='AnchorExample.x3d' -->
  <a-assets></a-assets>
  <!-- Root Transform translation='0.0 -2.5 0.0' -->
  <a-entity position="0 -2.5 0">
    <!-- Define "Stair" once, then reuse it (X3D DEF/USE equivalent) -->
    <a-box id="stair"
           position="0 0 0"
           width="4"
           height="0.25"
           depth="1"
           material="color: #FFFFFF">
    </a-box>
    <!-- Two more stairs (re-using same geometry/settings) -->
    <a-box position="0 0.5 -1"
           width="4"
           height="0.25"
           depth="1"
           material="color: #FFFFFF">
    </a-box>
    <a-box position="0 1 -2"
           width="4"
           height="0.25"
           depth="1"
           material="color: #FFFFFF">
    </a-box>
    <!-- Anchor (clickable door) -->
    <a-link position="0 4.125 -2.6"
            title="Twisty Stairs"
            href="Stairway.x3d">
    </a-link>
    <!-- Door + knob geometry (kept as actual shapes like in X3D) -->
    <a-entity position="0 4.125 -2.6">
      <!-- Door panel: Box size='3.0 6.0 0.2' -->
      <a-box width="3"
             height="6"
             depth="0.2"
             material="color: #996600">
      </a-box>
      <!-- Knob: Transform translation='1.18 0.0 0.2' + Sphere radius='0.15' -->
      <a-sphere position="1.18 0 0.2"
                radius="0.15"
                material="color: #4D4D4D">
      </a-sphere>
      <!-- Make the door+knob clickable to navigate (A-Frame equivalent of Anchor) -->
      <a-entity class="clickable"
                geometry="primitive: box; width: 3; height: 6; depth: 0.2"
                material="opacity: 0; transparent: true"
                position="0 0 0"
                onclick="window.location.href='Stairway.x3d'">
      </a-entity>
    </a-entity>
  </a-entity>
  <!-- Simple camera so you can see it -->
  <a-entity position="0 1.6 6">
    <a-camera></a-camera>
  </a-entity>
  <!-- Light (A-Frame defaults exist, but adding explicit light helps match expectations) -->
  <a-light type="ambient" intensity="0.8"></a-light>
  <a-light type="directional" position="1 2 1" intensity="0.6"></a-light>
</a-scene>
I digress.. This is just me being nostalgiac for tag based 3D, which is something that may be irrelevant in future, following changes in how we describe and produce software..
Back on track – Create an Environment
Let’s firstly create the environment which the “robot” will exist. I’ll use the scripting version of AFRAME for this.
 const scene = document.createElement('a-scene');
    scene.setAttribute('embedded', '');

    // Create ground
    const ground = document.createElement('a-plane');
    ground.setAttribute('position', '0 0 0');
    ground.setAttribute('rotation', '-90 0 0');
    ground.setAttribute('width', this.mapConfig.width);
    ground.setAttribute('height', this.mapConfig.height);
    ground.setAttribute('id', 'ground');
    scene.appendChild(ground);

    // Create obstacles from map config
    this.mapConfig.obstacles.forEach((obs, index) => {
      const obstacle = document.createElement('a-box');
      obstacle.setAttribute('position', `${obs.position.x} ${obs.position.y} ${obs.position.z}`);
      obstacle.setAttribute('width', obs.size.width);
      obstacle.setAttribute('height', obs.size.height);
      obstacle.setAttribute('depth', obs.size.depth);
      obstacle.setAttribute('color', obs.color);
      obstacle.classList.add('obstacle');
      scene.appendChild(obstacle);
    });
And add a goal
// Create goal
    const goal = document.createElement('a-cylinder');
    goal.setAttribute('position', `${this.mapConfig.goalPosition.x} ${this.mapConfig.goalPosition.y} ${this.mapConfig.goalPosition.z}`);
    goal.setAttribute('radius', '1');
    goal.setAttribute('height', '1');
    goal.setAttribute('id', 'goal');
    scene.appendChild(goal);
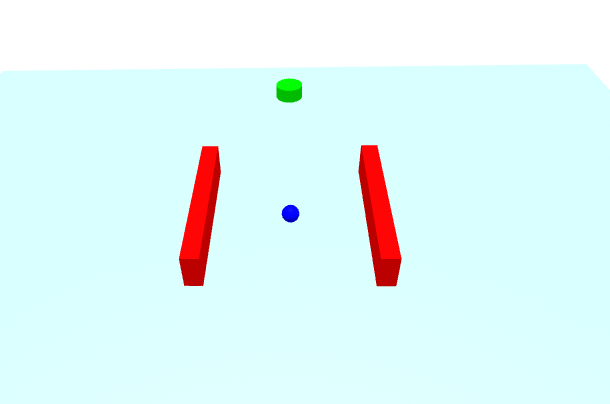
And add the object which will represent the agent
// Create agent with test component
    const agent = document.createElement('a-sphere');
    agent.setAttribute('position', `${this.mapConfig.startPosition.x} ${this.mapConfig.startPosition.y} ${this.mapConfig.startPosition.z}`);
    agent.setAttribute('radius', '0.5');
    agent.setAttribute('id', 'agent');
    scene.appendChild(agent);
From that we get the following scene.
Our agent now needs to be connected to some sort of bridge to allow the reinforcement learning pipeline to control the movement of the agent and receive feedback.
This requires a movement adapter in the AFRAME world, and a connection to the python reasoning engine. For this we’ll use websockets.
executeAction: function(action) {
const forwardSpeed = action[0] * this.data.speed;
const rotationDelta = action[1] * this.data.rotationSpeed;
this.rotation += rotationDelta;
const direction = new THREE.Vector3(
Math.cos(this.rotation),
0,
Math.sin(this.rotation)
);
this.velocity.copy(direction).multiplyScalar(forwardSpeed);
this.el.object3D.position.add(this.velocity);
this.el.object3D.rotation.y = this.rotation;
this.episodeSteps++;
},
getObservation: function() {
const position = this.el.object3D.position;
const goal = document.querySelector('#goal').object3D.position;
const rays = [];
for (let i = 0; i < 8; i++) {
const angle = (i / 8) * Math.PI * 2 + this.rotation;
const direction = new THREE.Vector3(
Math.cos(angle), 0, Math.sin(angle)
);
this.raycaster.set(position, direction);
const intersects = this.raycaster.intersectObjects(
Array.from(this.obstacles).map(el => el.object3D), true
);
rays.push(intersects.length > 0 ? intersects[0].distance : 10.0);
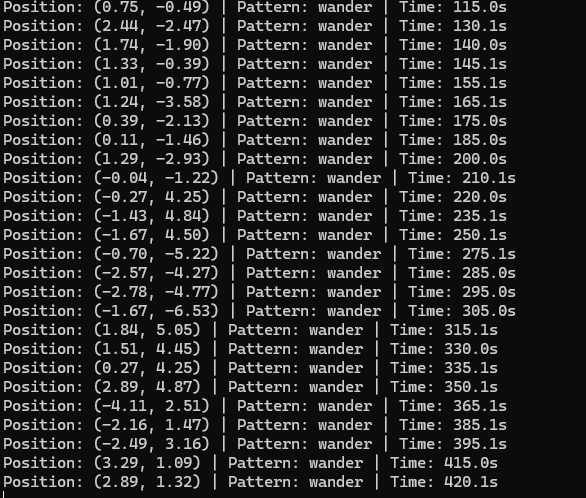
}And the python script to send requests via websocket, and move randomly, just to check that websockets is working ok.
async def random_agent(websocket):
    """Simple random agent that responds to environment observations."""

    try:
        async for message in websocket:
            data = json.loads(message)
            reward = data['reward']
            done = data['done']

            if done:
                print(f"Episode completed! Final reward: {reward:.2f}")

            action = [
                random.uniform(-1.0, 1.0),  # Forward/backward
                random.uniform(-1.0, 1.0)   # Rotation
            ]

            await websocket.send(json.dumps(action))

    except websockets.exceptions.ConnectionClosed:
        print("Browser disconnected")
And finally, using a gym to train the agent.
class AFrameNavigationEnv(gym.Env):


    def __init__(self, websocket_port=8765):
        super().__init__()


        self.observation_space = spaces.Box(
            low=-np.inf, high=np.inf, shape=(16,), dtype=np.float32
        )

        self.action_space = spaces.Box(
            low=-1.0, high=1.0, shape=(2,), dtype=np.float32
        )

        self.websocket_port = websocket_port
        self.websocket = None
        self.current_obs = None
        self.current_reward = 0
        self.current_done = False

    async def connect(self):
        async with websockets.serve(self.handle_client,
                                     "localhost",
                                     self.websocket_port):
            print(f"RL Bridge listening on ws://localhost:{self.websocket_port}")
            await asyncio.Future()  # Run forever

    async def handle_client(self, websocket):
        self.websocket = websocket

        try:
            async for message in websocket:
                data = json.loads(message)

                # Store state from environment
                self.current_obs = self.parse_observation(data['observation'])
                self.current_reward = data['reward']
                self.current_done = data['done']

                # Get action from RL agent
                action = self.get_action_from_agent()

                # Send action back to browser
                await websocket.send(json.dumps(action.tolist()))

        except websockets.exceptions.ConnectionClosed:
            self.websocket = None

    def parse_observation(self, obs_dict):
        return np.array([
            obs_dict['position'][0],
            obs_dict['position'][1],
            obs_dict['rotation'],
            obs_dict['velocity'][0],
            obs_dict['velocity'][1],
            obs_dict['goal_distance'],
            obs_dict['goal_direction'][0],
            obs_dict['goal_direction'][1],
            *obs_dict['ray_distances']
        ], dtype=np.float32)

    def get_action_from_agent(self):
        if hasattr(self, 'policy'):
            return self.policy(self.current_obs)
        else:
            # Random action during initialization
            return self.action_space.sample()

    def step(self, action):
        return (
            self.current_obs,
            self.current_reward,
            self.current_done,
            False,  # truncated
            {}      # info
        )

    def reset(self, seed=None, options=None):
        super().reset(seed=seed)

        if self.current_obs is None:
            return np.zeros(self.observation_space.shape, dtype=np.float32), {}

        return self.current_obs, {}


async def train_navigation_agent():
    """Train RL agent to navigate A-Frame environment."""
    from stable_baselines3 import PPO
    from stable_baselines3.common.callbacks import CheckpointCallback

    env = AFrameNavigationEnv(websocket_port=8765)

    asyncio.create_task(env.connect())

    while env.websocket is None:
        await asyncio.sleep(0.1)


    model = PPO(
        "MlpPolicy",
        env,
        verbose=1,
        learning_rate=3e-4,
        n_steps=2048,
        batch_size=64,
        n_epochs=10,
        gamma=0.99,
        gae_lambda=0.95,
        clip_range=0.2,
        tensorboard_log="./ppo_navigation_tensorboard/"
    )

    # Checkpoint callback
    checkpoint_callback = CheckpointCallback(
        save_freq=10000,
        save_path="./models/",
        name_prefix="navigation_ppo"
    )

    # Train
    model.learn(
        total_timesteps=1_000_000,
        callback=checkpoint_callback
    )

    # Save final model
    model.save("navigation_agent_final")


if __name__ == "__main__":
    asyncio.run(train_navigation_agent())
The resulting websocket chatter will train the agent using a gym on tensorboard.
See github for the repo: https://github.com/neilhighley/2026-digitaltwin
Python requirements
gymnasium>=0.29.0
numpy>=1.24.0
websockets>=12.0
stable-baselines3>=2.0.0
torch>=2.0.0
tensorboard